Write and maintain specs
All steps on this page take place in the Specs tab of the Specs view. The session mode limits only the AI. You can create and change specs in every mode.
For a sidecar profile you can edit the body and the anchors. Creating specs, fields and status changes are not available there.
Create a spec
- In the artifact list, click + New.
- Under Type, choose the artifact type, for example User Requirements Specification (URS).
- Under Title, enter a short title.
- Under Body (Markdown), write the text. The field starts with
## Description. - Click Create.
Tracemoor assigns the ID, writes the file into the type folder and selects
the new spec. Its status is draft.
Edit the body
- Select the spec and open the Body tab.
- Click the pencil button at the top right (Edit body in place).
- Edit the Markdown text.
- Press
Cmd+S(Windows/Linux:Ctrl+S) or click the save button.
The body is also saved when the editor loses focus. Saving writes only the body. The frontmatter stays as it is. The eye button switches back to the rendered text.
Fill in fields
The Fields tab lists the fields that the profile declares for the type,
plus every other field already present in the file. Examples are
rationale, classifications, design_notes and acceptance_criteria.
- Open the Fields tab.
- Enter the values. In list fields, + add item adds a line and remove deletes one. Fields that hold structured data take JSON.
- Click Save fields.
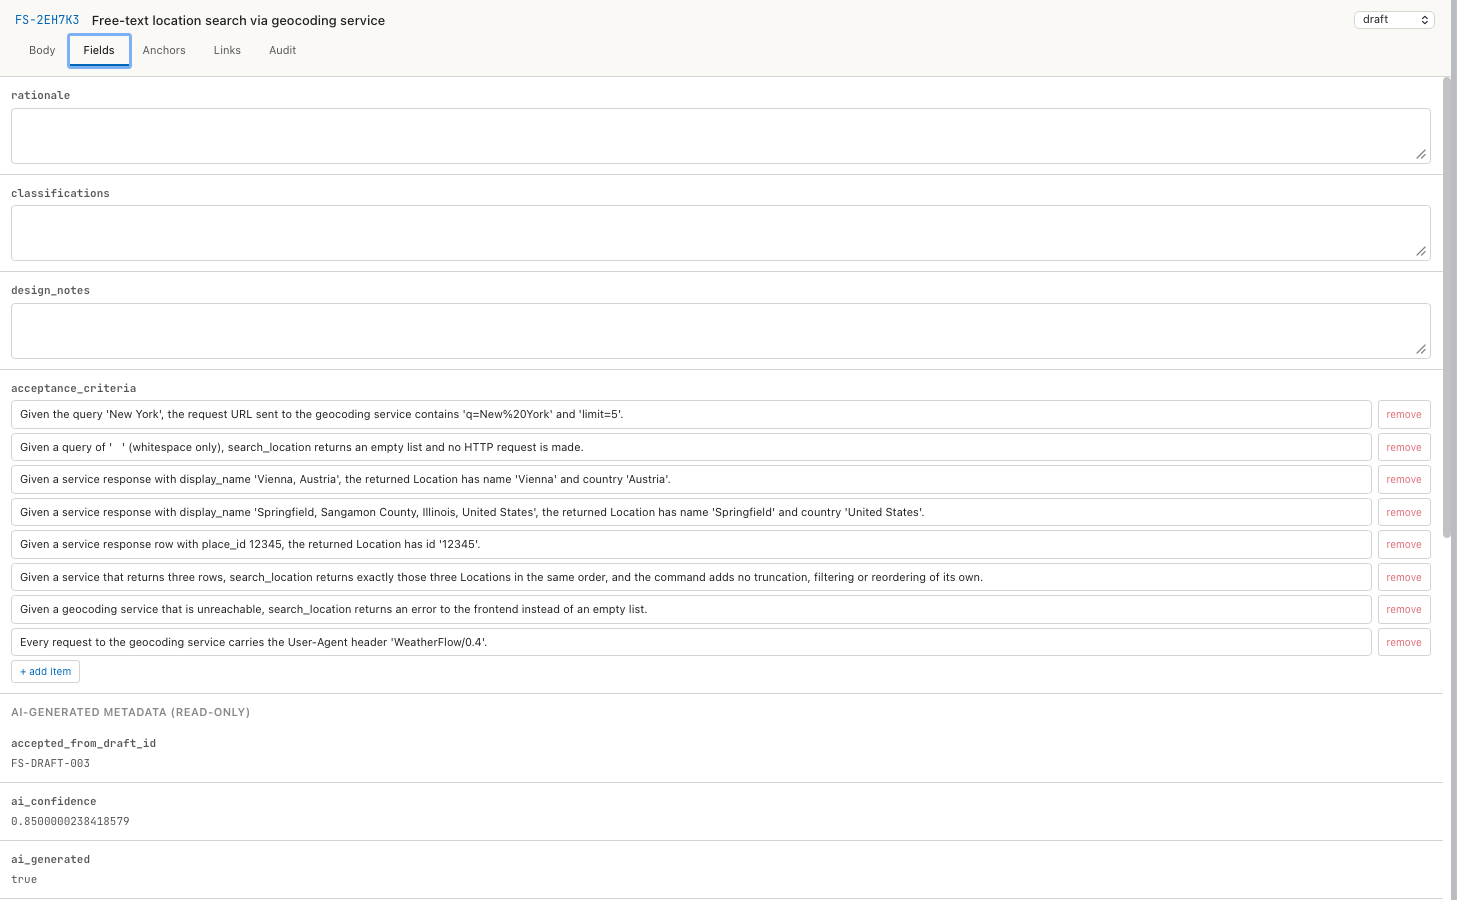
Under AI-generated metadata (read-only) a spec accepted from a draft shows
where it came from, for example accepted_from_draft_id: FS-DRAFT-001 and
ai_confidence. These fields cannot be edited.
Link specs
Links build the trace chain from requirement to test. See Links and the trace chain.
- Select the spec and open the Links tab.
- In the first field, choose the link type, for example
satisfies. The list offers only the link types that the profile allows for this type. - In the search field, type part of the target's ID or title and pick the target from the list. The list offers only artifacts of a type the link allows.
- Click Add link.
A click on a linked ID opens that spec. remove deletes the link. A link
to an artifact that no longer exists shows suspect.
Change the status
- Select the spec.
- In the status menu at the top right, choose the new status.
- In Change status, enter the reason and click Confirm.
Only the transitions shown in Status workflow are allowed. Any other transition fails with "transition … is not allowed".
When the profile requires electronic signatures (GAMP 5 does), choosing
approved or rejected opens the signature dialog instead of the reason
field. A spec in review also shows Sign… next to the status menu. See
Signatures.
Change the status of several specs
- In the artifact list, tick the specs, or click Select all (N).
- In the bar at the bottom of the list, choose the target status, for example
→ review. - Click Apply.
The reason recorded in the audit trail is "Batch" and the status. Specs for
which the transition is not allowed stay unchanged; the message at the bottom
counts them as failed. With signatures required, approved and rejected
ask for one signature for the whole batch.
Read the history of a spec
The Audit tab lists every event recorded for the spec: creation, edits, status changes, signatures, anchors added or removed, suspect raised and resolved. Each row has Timestamp, Actor, Kind, Hash and Payload. The hashes form a chain over all events of the exploration, so a changed or deleted event is detectable. See Audit trail.
The audit trail is stored in the analysis database of the exploration, not in the spec files. Analysis › Clear Cache & Re-analyze deletes it.