Resolve merge conflicts
Before a merge starts, Tracemoor checks whether it would conflict. If it would, a dialog lists the affected files. Click Merge and resolve conflicts to start the merge, or Cancel to leave the branches unchanged.
When a merge, rebase or cherry-pick stops on conflicts, the Git view switches to the merge editor. It stays there until the operation is committed or aborted.
Layout
- A banner at the top names the operation (Merging, Rebasing or Cherry-picking) and the number of conflicts left, for example Merging — 1 conflict left. When every file is resolved, it changes to All conflicts resolved — ready to commit. It has the buttons Abort and Commit merge.
- The conflict list on the left shows the files with conflicts.
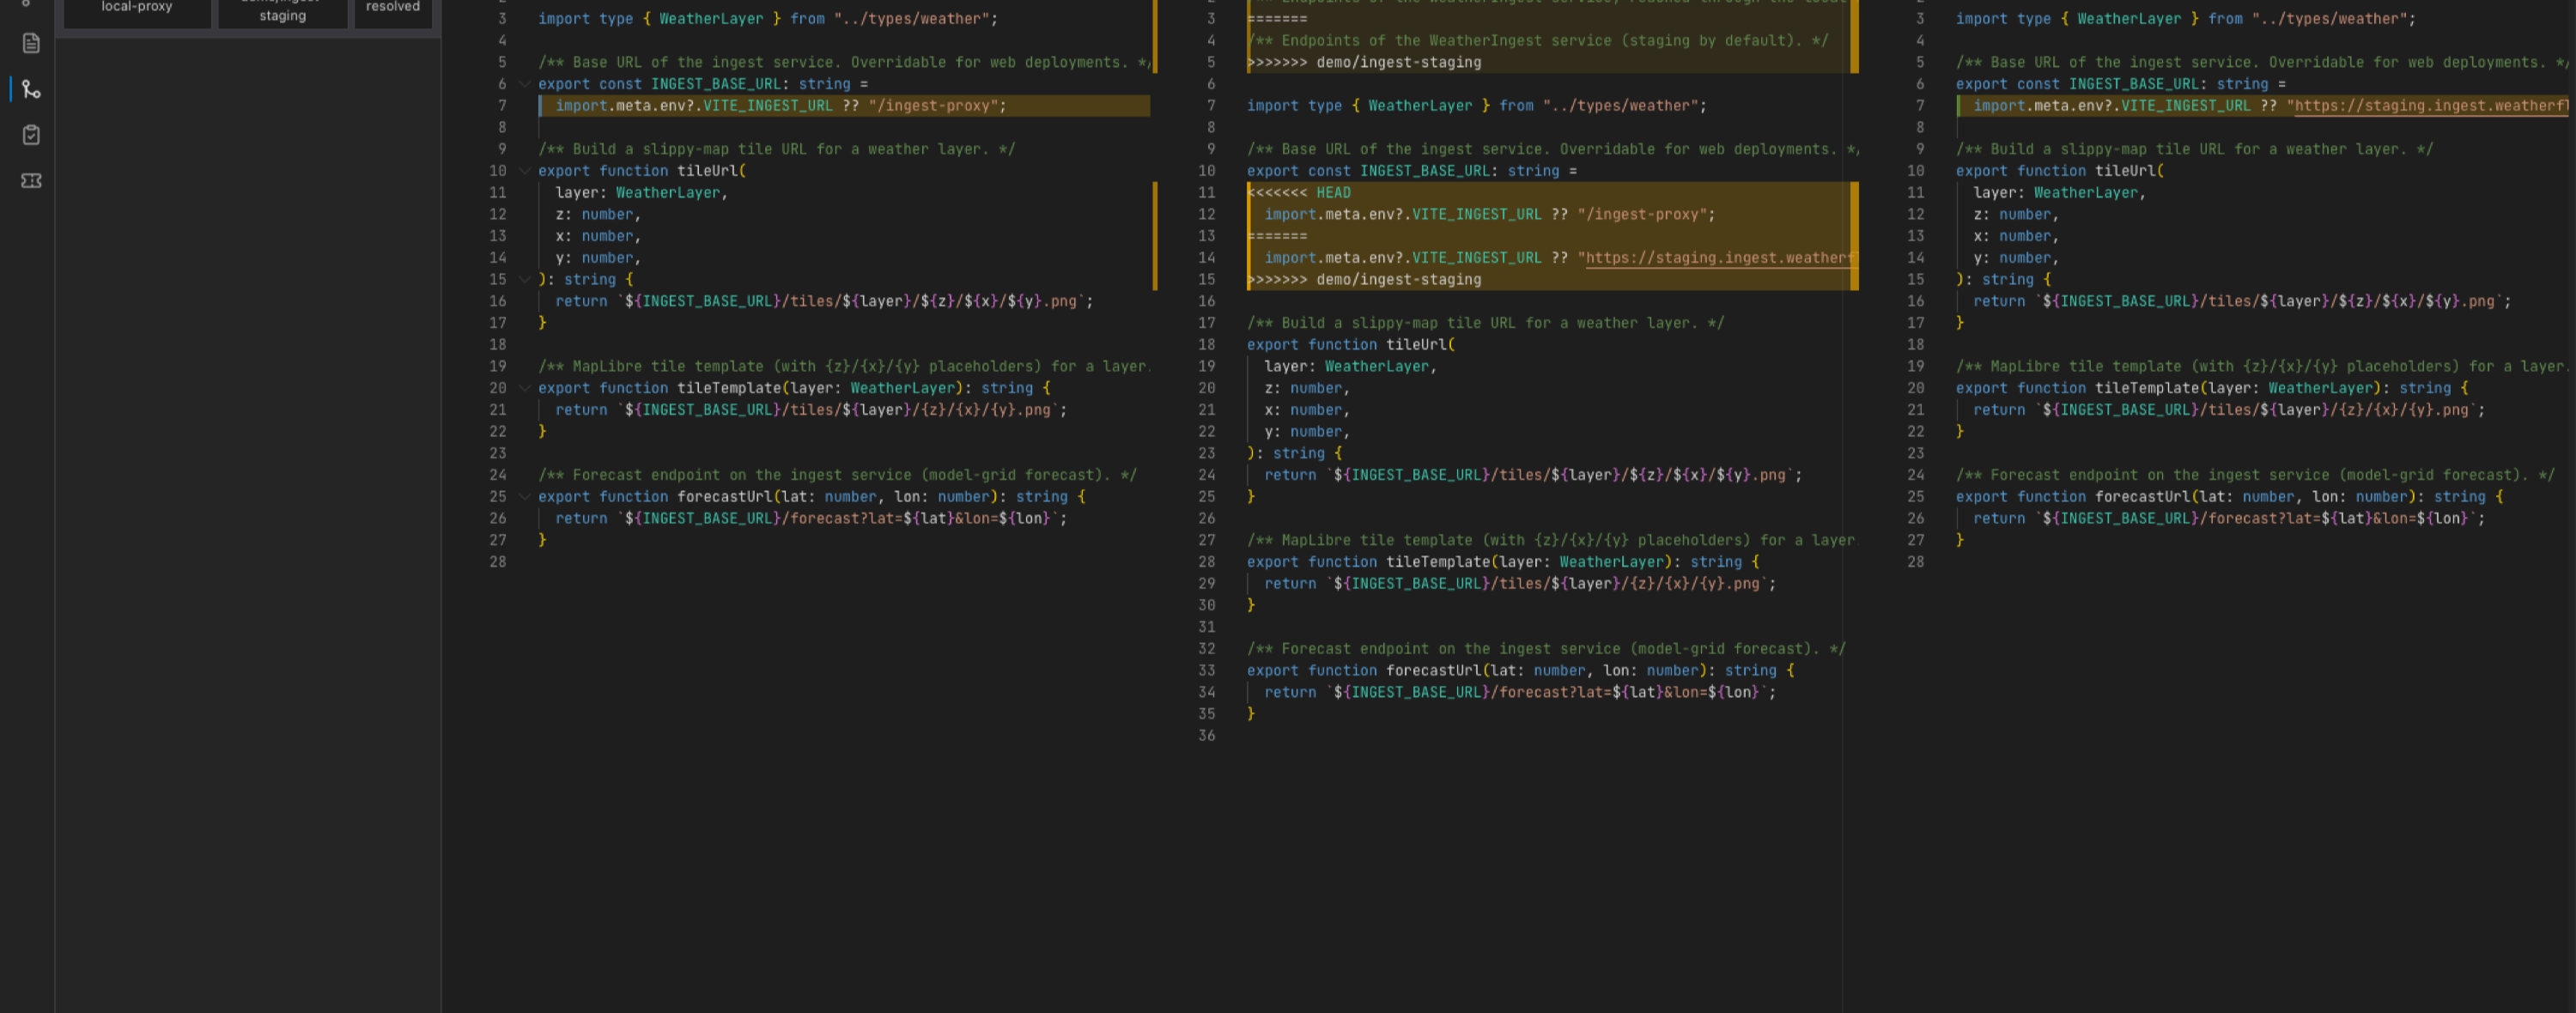
- The three-way editor on the right shows the selected file: your version, the incoming version and the Result.
Resolve a file
-
Select the file in the conflict list.
-
Go through the conflict blocks with ◀ Prev and Next ▶. The counter between them shows the current block, for example Block 1 / 2.
-
For each block, click one of these buttons:
Button Result Take ours Keeps your version of the block. The button shows the name of your branch. Take theirs Keeps the incoming version. The button shows the name of the incoming branch. Take both Keeps both versions, yours first. You can also edit the Result pane directly.
-
Click Save resolved.
Sync scroll keeps the three panes at the same position.
If you resolved a file outside the merge editor, for example in the terminal, click Mark resolved next to the file in the conflict list.
Finish or abort
Commit merge becomes available when no conflicts are left. It opens a
commit form with the message Git prepared, for example
Merge branch 'feature/x' into main. Edit it if needed and click Commit.
Lines starting with # are left out of the commit message.
Abort cancels the operation after a confirmation and restores the state before it started.